How to prepare for an Art Fair
I’ve done a couple of art fairs previously and have curated a few exhibitions. Below are some recommendations for consideration if you've never exhibited before to help:
Gain visibility about what you do and why you do it
Connect with people who love your work after the event is over
Sell work and support your practice
PREP YOUR PRODUCT + HAVE DIFFERENT PRICE POINTS AVAILABLE
Before my first fair I was thinking of just presenting originals and then having a booklet listing prints clients could order. I was advised that fair goers like to see, buy and take items home straight away and it’ll be wise to have prints on hand to make purchasing easier and immediate. I’m so glad I listened - my first fair I sold no originals but sold a lot of prints!
Offering a variety of options and price points can be a good idea also. Some art fair goers may want larger statement pieces, others may not have room for a large piece and prefer smaller works, others may not have the budget originals but would love to buy something as a souvenir of the art fair experience and as a gesture to support your work. Orignal artwork is a high friction purchase because so many things need to align for the sale to be made - not only does the buyer need to have interest, space and budget to buy original art, but the art needs to resonate with their taste, the space they have in mind, be the right colour / size / shape etc. For this last reason, it may be a good idea to have some merchandise available where there is less friction to make the purchase.
Try having different items at different price points so anyone with interest in your practice can leave with a purchase. Depending on what’s allowed at the event, this may include:
Originals in different sizes
Prints - This may include Limited Edition, open edition, Archival prints, lower quality posters etc
Merchandise such as:
Visual Diaries / Notebooks with your artwork on the cover
Colouring books
Postcards
Shirts
Tote bags
Jig saw puzzles
Coasters
Whilst offering different price prints is smart, having a messy space can feel overwhelming for the client. I’d recommend making sure that the styles and products available make sense together and are presented in a way that is easy to navigate. Essentially at a fair you’re presenting a temporary store: make shopping easy for the client.
SALE + PRICE STICKERS
Have some red dot stickers on hand to mark works that have sold. Some artists like to stick the sale sticker along with the price tag on the wall in a little collection after pieces have been taken home by the buyer to signify to new customers that the work in this booth is desirable and selling.
Make sure prices are visible and clear to read for your originals, prints and other merchandise. It can be a deterrent for the exhausted, overwhelmed (there is SO much to see at fairs) or shy if clients need to hunt or ask to find out a price.
Prices can be indicated by:
Didactics next to artworks
Stickers on merch
Clear Signage near products e.g. “A3 Prints $140, A4 Prints $90”
DIDACTICS
Didactics provide written information and are presented next to an artwork and will often list:
Title of work
Materials
Description about the meaning behind the work or interesting facts
Price
Special payment methods if an option e.g. Art Money
For exhibitions I would include the year the work was completed but tend to omit that information for art fairs and prioritise information that may help introduce myself, the story behind the work and make the sale.
For larger works its probably a good idea to list the measurements so if a client needs to call home to see if a work will fit in their space the dimensions are handy. Smaller works fit in most places.
Additional options to include on a Didactic:
Optional #1: Include a QR code that links back to the artist’s website, a video of the process, links to prints of the work (Ideally you’ll have the prints close at hand in the stall… and even have spares on site or nearby in your securely parked car, for example, to quickly replenish stock in case you run out)
Optional #2: Mention your instagram profile or website. I saw an artist include a mention of her instagram profile very close to her work on a Didactic and essentially if a passer by took a photo of her work her Instagram handle would likely also get snapped in the photo so the creator wasn’t completely being omitted.
LARGER DIDACTICS & SIGNAGE
You may also like to have a printed blurb on the wall about your practice so people get an overview of what you’re about, and a sign with a QR code that leads back to your Mailing List, Website and socials.
I like to use Adobe Illustrator and put all my signage, didactics and even my product stickers on a standard sized sheet with light lines so I know where to later cut, and get them printed on Self Adhesive Posters . Once printed I cut out all the didactics, product labels etc by hand (be warned it is cost effective but time consuming - I’d recommend putting on a good podcast while you’re cutting everything out). The Self Adhesive Posters remove from walls without leaving marks or residue. It also means that I can customise the Product Stickers to the exact amount of Prints for example, that I’ve printed for the fair. A guillotine paper cutter might expedite the process.
HANGING
Make sure all works are ready to hang ahead of time e.g framed works and stretched canvas fixed with D-Rings and wire on the back. For Paper works that are unframed you might consider a combination of screws drilled into the wall and fixing the work with gallery magnets.
Different spaces may have differing requirements of how to install into their walled surfaces so it’s important to follow their directions. I would recommend packing for the install:
A drill with a freshly charged battery
Screws
Level
Masking tape (can be used to mark where you’re going to put things/ drill things)
Light pencil (so you can mark where you’re going to drill things)
Eraser
Scissors
Visibility Vest may be required for set up
Cleaning wipes
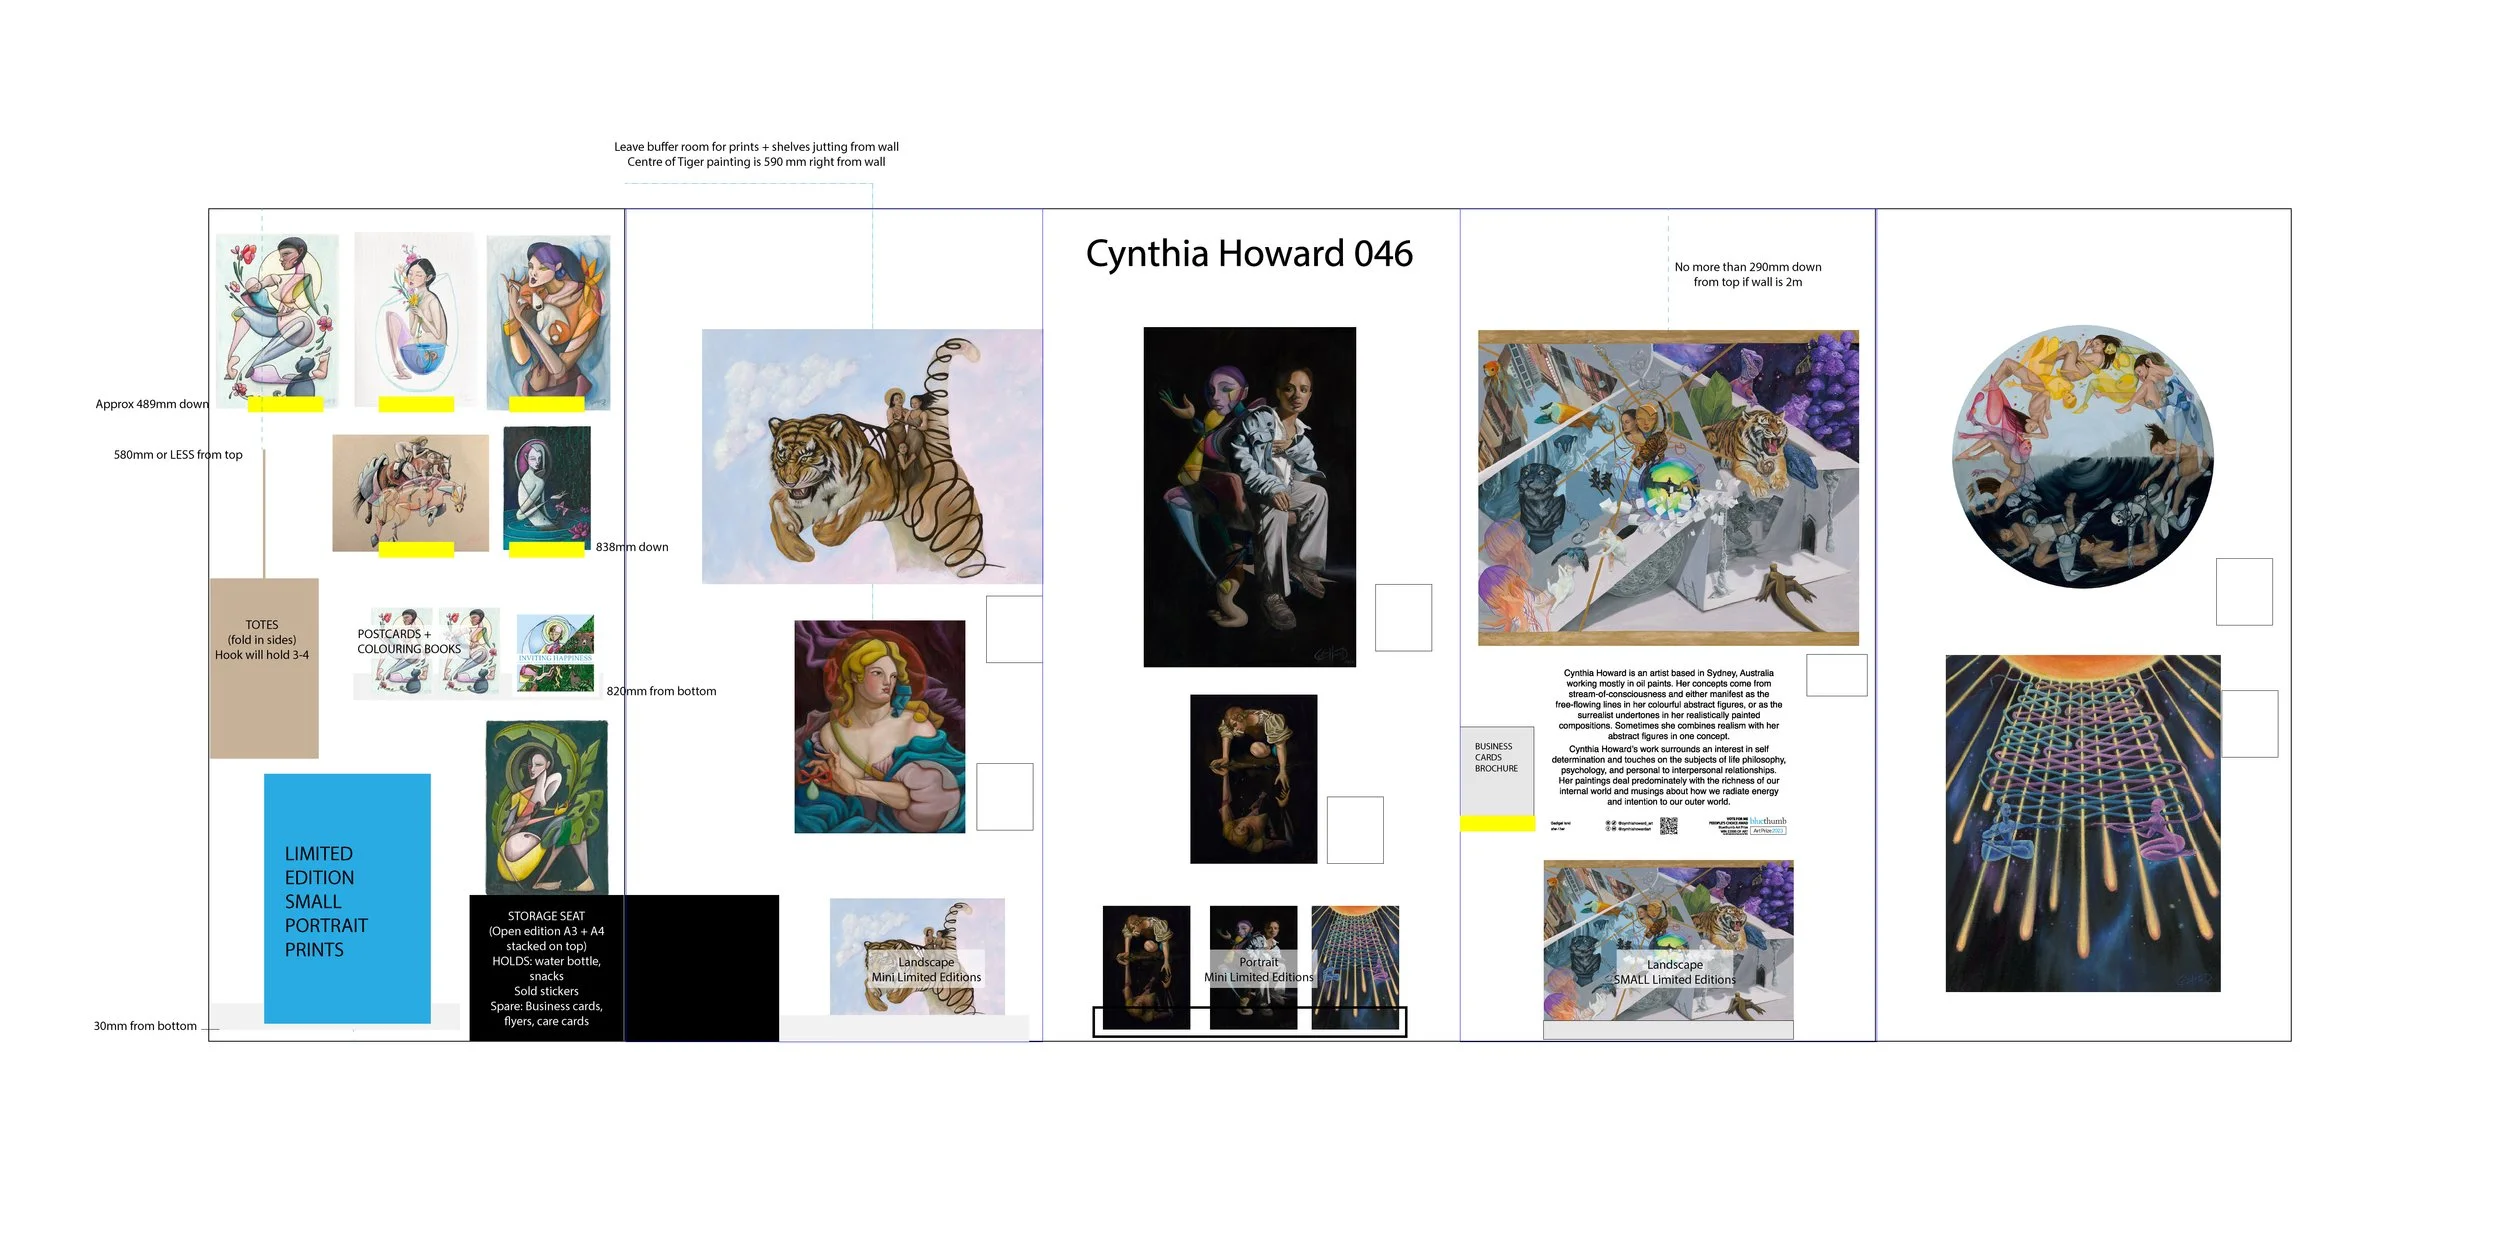
Above: Plan of where all the artworks and pieces would be placed in the booth done to scale in Adobe Illustrator. I also did a version where the two side walls were reversed incase my booth was located on the other side of the aisle.
ORGANISE YOUR STALL
You will need to present your artwork and merch. You may want to consider organising somewhere to sit or you’ll be standing a lot. You may also want to consider somewhere to store your water bottle, wallet, invoice pad, spare pens (so you can write down sales etc on the invoice pad), red dot sale stickers, and spare merch you want quickly on hand. I would also recommend thinking about where to place information that can tell viewers:
What your practice is about / or who you are
Prizes you’ve won, copies of publications you’ve been in etc - any successes that give you credibility, and potential buyers the peace of mind that they’re making a good purchase
Avenues for keeping connected in future such as Social Media profiles, ways to sign up to your newsletter, business cards, flyers etc
CURATE YOUR STALL
I would recommend drafting where everything is going to go with a sketch that’s done to scale ahead of time so you can problem shoot the space and arrive Bump In day with a plan of where everything is going. It can also help you visualise what artworks will replace what if something sells on one of the first days of the fair so you don’t have blank spaces on your wall. If it’s an option with the Fair organiser, you may opt to have walls painted different colours which may help artworks stand out or help tell the story of your brand.
DISPLAY IDEAS:
Free standing Print racks
Picture frame ledges drilled to the wall or shelves for books, prints, postcards, brochures, business cards
Hooks drilled to wall to hang totes, clothing
Benches, small tables, consoles floating in the middle of the space or against wall
Plinths for sculptures or Merch
Rugs, lights etc can also be opted for if it improves your aesethetic. Just make sure they don’t detract or become tripping hazards etc.
Artists usually charge for the size of the booth so it’s a good idea to be as space efficient as possible.
A print rack purchase may be a great investment as you can use it again and again.
If you don’t mind standing for long periods and aren’t adverse to the aesthetic you could purchase a foot stool that doubles as storage to hide your belongings. If the prospect of standing for multiple days feels exhausting I would recommend organising a high stool to sit on - because it’s higher you can sit and be approximately the same level as fair goers who are standing and therefore not feel rude or distant chatting to people whilst seated.
MARKETING AT THE FAIR
Some people may discover your booth but not have the budget to purchase, or be unable to purchase as much as they like on the day. They may appreciate a business card to take home or a way to connect with you after the event. You can consider:
Printing a QR code that leads to your socials, Newsletter and Website. You can do this as a sticker for example or as a print out that is inserted into a Perspex Display that sits on a table.
Printing a sticker with your social media handle to place on a wall
A clip board where people can add their names to join your newsletter. You may offer them a discount when they sign up, or to go into the draw for a prize to make it more enticing.
Business Cards. I think cards with your name, contact details and social media handles on one side, and a hero image of your artwork on the other is a good choice.
Brochures about your practice, services you offer, more info about products, stories behind artworks, social media links etc.
Folio books that clients can flip through that showcase Publications you’ve been in, other projects you’ve done, examples of other services you offer (e.g. mural paintings), other work for sale that you couldn’t fit at the fair
An iPad or screen displaying videos of your work in progress or any other footage clients may find captivating. (You will need to consider supplying your own charging solutions or discussing with the Fair organisers having power to your booth)
Please note that different fairs, in different cities and at different times might attract different crowds drawn to different things.
OTHER THINGS TO CONSIDER (IN NO PARTICULAR ORDER)
Pack a spare phone charger / battery for the fair
Consider paying for, or bringing additional lights to light your display. Even beautiful things don’t look so beautiful in average light.
During the fair keep you phone handy and take photos of clients who buy your work with their new piece and share it to your socials to share gratitude and drum up interest (with their permission of course). Also take pics of friends in your booth who are kind enough to visit and support your work.
Get ready to chat to people! People love asking the artist about their process and what the work is about. If you’re shy I’d recommend coming up with some ideas of what to say before the show so that you don’t have the pressure of making it up on the spot. You can fake it to you make it, or be honest and genuine: “I’m a little shy and spend a lot of time in the studio painting but I would love to share what this piece is about…”
Greet everyone that shows an interest in your work even if it’s as little as a friendly hello. Everyone deserves to be acknowledged. It’s not good customer service to ignore people.
Build rapport, build trust THEN ask for the sale. Be genuinely interested in the people that have come and shown interest in your work. Who are they? What brought them to the fair? What are their values? Are they artists or art lovers or both? Are they decorating their home at the moment or seeking inspiration? Are they sussing out the fair because they’re thinking of participating next time? We cannot assume who people are and what needs they’re hoping to meet. Practice asking questions to get to know the people. Starting a dialogue is a great way to get insights on how your work is perceived and how it affects people and whether they individual is interested in buying today, or whether they might not be in market but would like to keep in touch. If someone shows interest in a piece and through your discussion it’s revealed that this piece is a great fit for them you can then ask ‘Would you like to take that one home today?’. You can also offer the print or other merch if the original is too expensive, or even just a free business card so they can connect with you when they’re ready.
Wear comfortable shoes and dress comfortably. Consider bringing a jacket if you get cold in air con / changing weather.
Pack dental floss and mints
Start organising weeks to months ahead of the fair to allow trouble shooting, framing, print order times etc. Order bubble wrap ahead of time so you can carefully pack your products for bump in and bump out
Check your mindset and expectations. Essentially a Fair is opening up a temporary store that exists for a few days then closes again. What the weather will be like those few days, what moods people will be in, what the foot traffic will be like etc, is anyone’s guess. Reflect on what might work for you to stay open and curious throughout the experience regardless of sales, because if your energy starts getting desperate you run the risk of turning off potential clients.
Start small. Learn. Then slowly scale. It’s near impossible to predict what will sell and what might not find its audience this time. Whilst some prints and merch might be cheaper to produce in bulk it’s hard to have an idea of the desirability of a product till it’s been tested in the market. It might be tempting to splurge on the biggest booth, hire designer furniture etc but if it’s our first fair it’s hard to know what the response might be.
Clearly write down the email address of postal addresses of clients who purchase your work so you can thank them after the fair. You may also want to invite them to the next fair / exhibition you do. You may also want to email them a copy of the Certificate of Authenticity for original works purchased also. Following up with clients to nurture the relationship is incredibly important.
Consider encouraging people to join your mailing list (and if you don’t have one - start one). Social Media algorithms change and ideally we’d like to stay connected with the awesome people who appreciate the arts.
Come in with clear goals that are in your control e.g.
I will greet everyone who stops at my booth
I will offer my business card at some point in the conversation to each new person I meet
Every hour I will give at least one genuine compliment to someone to keep my outlook positive and to focus on the experience of others
I will learn from what works and what doesn’t
Help other artists at the fair and encourage a supportive and positive experience for all involved.
All the best with getting your work out there!
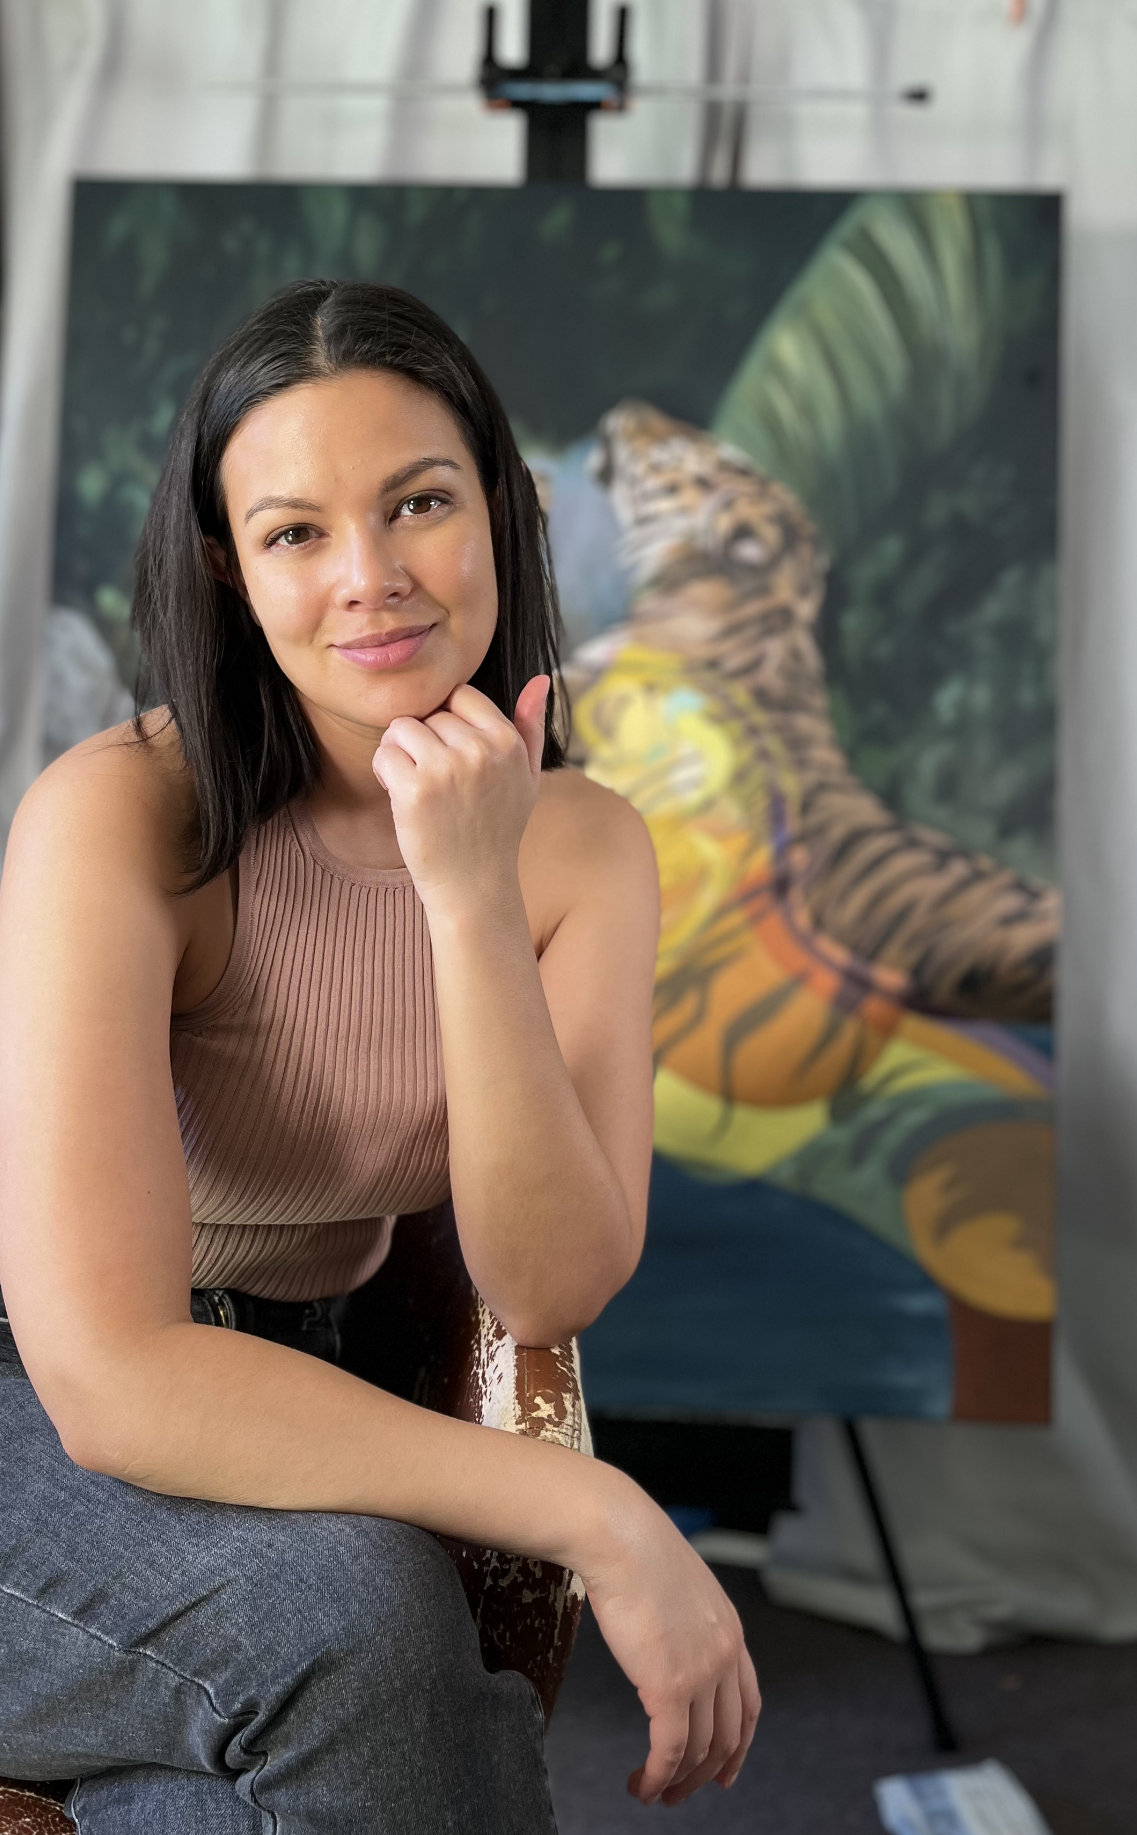
Cynthia Howard is a contemporary artist based in Sydney, Australia working mostly in oil paints.
Cynthia Howard’s work surrounds an interest in self determination and touches on the subjects of life philosophy, psychology, and personal to interpersonal relationships. Her paintings deal predominately with the richness of our internal world and musings about how we radiate energy and intention to our outer world.